MONARK : Reskinned

Hi everyone!
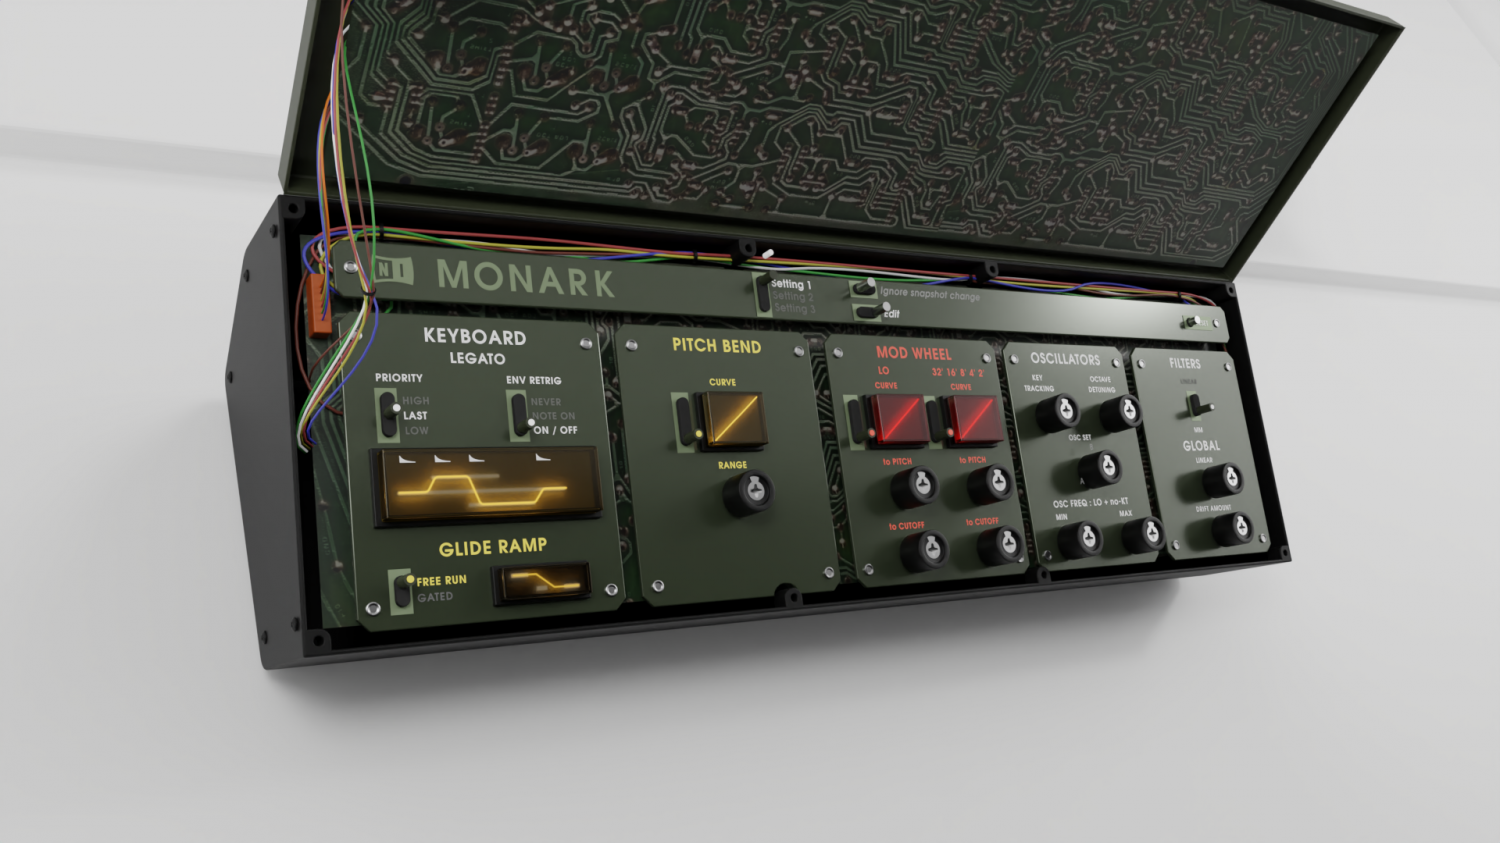
I changed the look of Monark. This new design is based off the Eurorack 84HP format.
You can download the reskin package via the link below. I tried to make it organized and easy to do, but please let me know if you run into something.
Working shots from the 3D work:
For view A:

For view B:
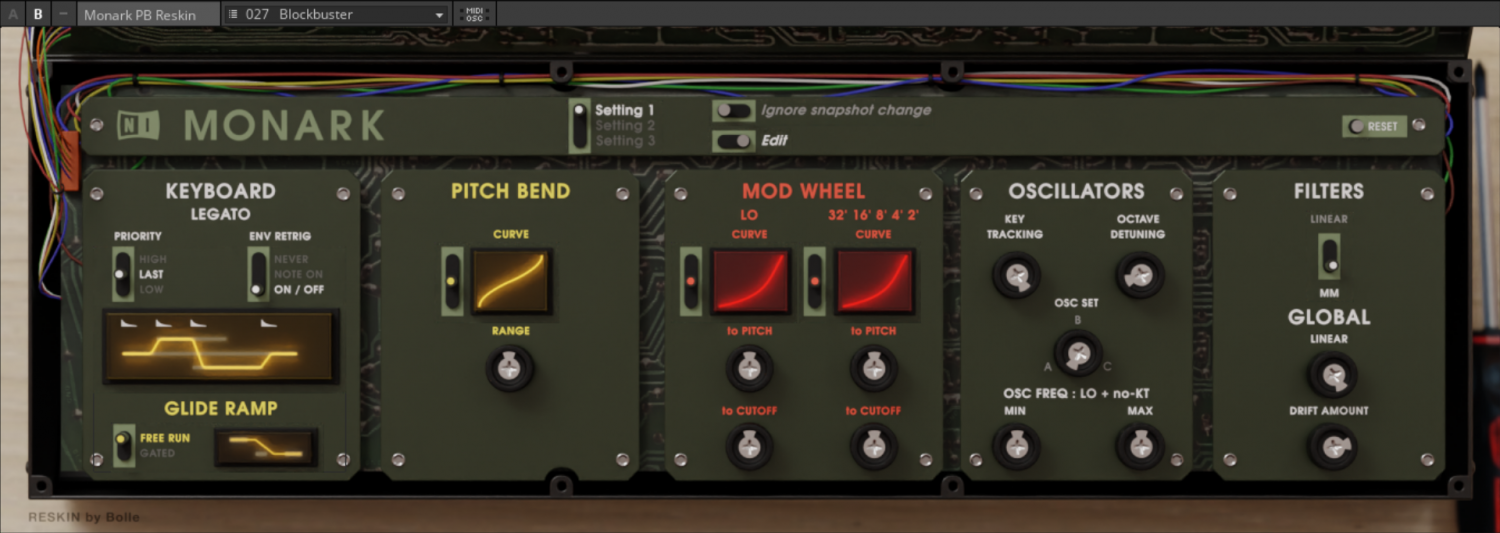
Screenshots:
View A:

View B:
A few words about the reskin and the files in the upload:
If you have basic knowledge of loading images and editing properties in Reaktor you can skip most of this post, but maybe read it anyway.
The original design of Monark is such that most panel elements consist of two and often three layers (the Multi Picture image, a Fader AND a Mouse Area on top of each other). All images and new element properties are included in the download and easily applied to the original design.
The difference between a 3D design like this and a 2D design is that panel elements don't share the same image. They all have their own image file and perspective view.
Every original part of Monark is used. So don't delete or replace any of the original elements/wiring. All changes are made only by replacing images/overlays, and changing Mouse Area and/or Fader properties and dimensions to fit the new knobs.
Consider making a copy of your Monark as your working file before you start.
View A and B are uploaded as separate .ens files. I thought it might help keep better oversight. I arranged the components in structure view from left to right and top to bottom in much the same way as they appear on the panel itself. So you can work from left to right, changing the look and properties of every control element as you go. Elements that belong together (f.i. a Multi Picture module of a knob, its overlaying Fader and/or overlaying Mouse Area) are placed adjacent to each other in structure view.
Included in the download:
- A background template is pre-loaded in the .ens files to help with pixel perfect positioning of the panel elements. You can load it as your Monark's view A or B background image before you start editing the controls. The new design requires everything to line up exactly with what's on the final background image (also included). I prefer baking everything into one background image rather than having to go through loading all the shadows and graphics etc etc as separate elements.
- The final background image as a separate file. Use them, because you don't want those visible tiny green leftover template edges on your new Monark.
- A transparent placeholder image. There may already be a placeholder in the top left corner of the original design i'm not sure right now. If not: use this.
- All images/animations for the knobs/faders/buttons etc etc. These are mostly lodged inside Multi Picture modules inside your Monark. Replace the original images with the new ones and set the right properties via their individual properties window.
- Copies of every (visible or invisible) knob/fader/button and their (transparent) images, and of every Mouse Area module. I include these because of changes made to their original dimensions and mouse resolution settings. This way you can easily find and apply these images and settings to the originals. After changes made, line out the edited elements dead centre on top of their respective knob/switch/button etc etc . You can turn off "use alpha" temporarily in the image properties settings to have a better idea of their position on the panel.
Two things i can think of, top of my head:
- The RGB lamp and image for the Load lamp on panel View A are unchanged from the original design, so just keep the originals. I only added a little overlay image to blend the lamp in with the new control panel. All you have to do is position the originals and add the overlay (a small rectangle with a hole in it) nicely over the original lamp. Change its layer number in Properties if it's not laying on top.
- For panel View B you will notice that some of the new panel elements don't behave right, visually. The original size and position of the Macro that serves as the bottom part of panel View B needs to be edited in order to accommodate the new, larger panel elements. You can do this easily in the Properties window. If anyone has difficulty with finding the right Macro, jump in here and i or someone else will help you out. I just don't remember right now exactly which dimensions and placement i gave it to make it work. But it works.
If you own Monark, download this package from the Reaktor User Library (link below) and get reskinning!
https://www.native-instruments.com/en/reaktor-community/reaktor-user-library/entry/show/14449/
Greets,
Peter
Comments
-
Thank you Peter, do you know Monark is a commercial product by NI?
1 -
I do now. I'm taking it down.
I'm a Complete owner and didn't realise Monark was a separate product.
I Might re-upload it as a skin only.
Greets,
Peter
2 -
Myself like a much the cross screw driver right beneath Monark on panel view B.
Yes, I'm an owner of Monark and your upload is my dl.
1 -
I'm so glad you noticed the screwdriver! It was the final touch for view B. It's not even a 3D model i made, but a flat 2D image i got from google. I cut out the screwdriver, scaled it, put it in place, added a little rotation and some blur to make the camera defocus effect. Turns out it matches the lighting perfectly and it looks totally realistic. 😆
Greets,
Peter
1 -
Dude, I'd hire you! Looks hella cool.
2 -
Peter, your gui is smaller than the original. It's good to place it on my 20" screen.
0 -
What do you mean?
My design is 1344 x 455px. The original is only 952 x 400px.
Greets,
Peter
0 -
Please upload as a skin - looks awesome
1 -
Very cool!
0 -
OK,
I will be making this skin available to everyone.
I could rant about how this should take me all of two minutes to prepare but that everything in Reaktor is so much more time consuming than it should be, so it'll take me two hours instead.
Just leave a thank you note or whatever in the comments when you download it.
Greets,
Peter
1 -
Looks nice Peter, looking forward to try out the skin.
I obviously have to ask to watch out what you upload in the user library / advertise in the community since Monark is one of our product.
I removed the link from your original post just to be extra safe.
1 -
Thanks so much for this, hope it’s not too much of a time drain for you, and also to install
1 -
What do you mean?
So it's an optical error in my mind.
1 -
Looks pretty good, congrats! 👍
hopefully, there's a way to share just the skin.
1 -
Hi everyone!
New download link and info in the edited first post of this thread!
Happy reskinning!
Let me know your impressions. I want to know if it's easy (or hard) to do for people who aren't that familiar with compositing in Reaktor.
Greets,
Peter
0


Categories
- All Categories
- 18 Welcome
- 1.7K Hangout
- 67 NI News
- 894 Tech Talks
- 4.6K Native Access
- 17.8K Komplete
- 2.2K Komplete General
- 4.8K Komplete Kontrol
- 6.3K Kontakt
- 1.1K Reaktor
- 407 Battery 4
- 917 Guitar Rig & FX
- 465 Massive X & Synths
- 1.5K Other Software & Hardware
- 6.4K Maschine
- 8.2K Traktor
- 8.2K Traktor Software & Hardware
- Check out everything you can do
- Create an account
- See member benefits
- Answer questions
- Ask the community
- See product news
- Connect with creators